
Deni Ice Cream Maker: A Comprehensive Instruction Manual Guide
Discover the joy of homemade frozen delights! This guide unlocks the full potential of your Deni ice cream maker, offering detailed instructions for creating delicious treats effortlessly.
Understanding Your Deni Ice Cream Maker
Your Deni ice cream maker is a fantastic appliance designed to bring the delightful experience of homemade frozen desserts right into your kitchen. It operates on a simple yet effective principle: a motorized dasher continuously churns a pre-frozen bowl containing your ice cream base, gradually freezing it into a creamy, delicious consistency. Unlike traditional methods requiring constant stirring, the Deni machine automates this process, freeing you to prepare toppings or simply relax.
This appliance isn’t limited to just ice cream; it’s incredibly versatile! You can create refreshing sorbets, tangy frozen yogurts, and even dairy-free alternatives with ease. The key lies in understanding how the machine interacts with your ingredients and the importance of proper bowl freezing. Think of it as your personal dessert-on-demand system, offering a convenient and customizable way to enjoy sweet treats throughout the year. Mastering its operation unlocks a world of frozen possibilities!
Unboxing and Component Identification
Carefully unpack your Deni Ice Cream Maker and verify all components are present. You should find the following: the motor base, the double-walled freezing bowl, the mixing dasher (comprising the paddle and driving connector), and a clear lid with a port for adding ingredients. Some models may include a recipe booklet or measuring tools.
Inspect each part for any shipping damage. The freezing bowl is crucial; ensure it’s undamaged as leaks will hinder performance. The dasher consists of multiple pieces – confirm the paddle securely attaches to the connector. The motor base houses the churning mechanism. Familiarize yourself with the power switch location. Retain the original packaging for potential warranty claims or storage. A quick inventory now prevents frustration later during your first batch!
Safety Precautions and Important Warnings
Prioritize safety when operating your Deni Ice Cream Maker. Always ensure the unit is placed on a stable, level surface before use. Never immerse the motor base in water or any other liquid. Keep the power cord away from heat sources and sharp edges. Do not operate the machine with a damaged cord or plug.
The freezing bowl contains a frozen liquid; avoid direct skin contact for prolonged periods. Never attempt to disassemble the motor base beyond the manufacturer’s instructions. Supervise children closely when the machine is in operation. Unplug the appliance when not in use and before cleaning. Do not operate continuously for extended periods – allow the motor to rest to prevent overheating. Failure to heed these warnings could result in injury or damage.

Preparing for Your First Batch
Embark on a delightful journey! Proper preparation is key to creamy, delicious results with your Deni ice cream maker – let’s begin!
Freezing the Bowl: Crucial Steps
Achieving the perfect ice cream consistency hinges on thoroughly freezing the Deni ice cream maker’s bowl. This is arguably the most critical step! Ensure the bowl is completely dry before placing it in the freezer; any moisture will hinder the freezing process.
Ideally, the bowl should be frozen for a minimum of 16-24 hours. A longer freezing period, especially in warmer climates, is highly recommended. Confirm the bowl is solid to the touch – no liquid sloshing should be audible.
Avoid refreezing a partially thawed bowl; start with a completely frozen one each time. Properly freezing guarantees optimal heat transfer during churning, resulting in a smooth, creamy texture. Remember, a well-frozen bowl is the foundation of successful homemade ice cream!
Ingredient Guidelines: Recipes for Success
For consistently delightful results with your Deni ice cream maker, ingredient quality and ratios are paramount. Begin with fresh, high-fat dairy – heavy cream is essential for a rich texture. Whole milk provides balance, while lower-fat options may yield icier results.
Sugar isn’t merely for sweetness; it impacts freezing point and texture. Experiment with granulated, powdered, or even alternative sweeteners. Flavorings, from vanilla extract to fruit purees, should be added judiciously.
Pre-chill your ice cream base thoroughly before churning – this speeds up the process. Avoid ingredients with large solid pieces; finely chop fruits or blend them into a smooth puree. Remember, a well-balanced recipe is key to unlocking the full potential of your Deni machine!
Mixing and Chilling the Ice Cream Base
Proper preparation of your ice cream base is crucial for optimal churning. Begin by gently heating your dairy and sugar in a saucepan, stirring constantly until the sugar is fully dissolved – avoid boiling! Remove from heat and stir in any extracts or flavorings.
For richer flavors, consider infusing the base with vanilla beans or spices during the heating process. Once mixed, strain the base through a fine-mesh sieve to remove any solids, ensuring a smooth final product.
Now, the chilling phase: pour the base into an airtight container and refrigerate for at least four hours, or preferably overnight. A thoroughly chilled base significantly reduces churning time and results in a creamier texture. This step is non-negotiable for Deni ice cream maker success!

Operating the Deni Ice Cream Maker
Now, let’s bring your frozen vision to life! Follow these simple steps to assemble, pour, and churn your delectable ice cream base with ease.
Assembling the Machine: A Step-by-Step Guide
Begin by ensuring your freezing bowl is thoroughly chilled – this is paramount for optimal results. Next, place the assembled dasher unit into the bowl, ensuring it spins freely. The dasher consists of the paddle and the drive blade; confirm secure attachment.
Carefully position the motor base onto the bowl, aligning the drive shaft with the opening in the dasher. A click often indicates proper placement. Secure the motor base by twisting it gently clockwise until it locks into position.
Double-check all components are firmly connected before proceeding. Improper assembly can lead to malfunctions or uneven freezing. Refer to the diagram in this manual for visual guidance if needed. Remember, a stable setup is key to a smooth churning process and a perfect frozen treat!
Pouring the Mixture and Starting the Churning Process
Once the machine is assembled, gently pour your chilled ice cream base into the freezing bowl. Avoid overfilling; leave at least one inch of space at the top to accommodate expansion during churning. Overfilling can strain the motor and prevent proper freezing.
Secure the lid onto the motor base, ensuring it’s firmly in place. Now, plug the Deni ice cream maker into a grounded electrical outlet. Press the power button to initiate the churning process. The machine will begin to rotate the dasher automatically.
Allow the mixture to churn for the recommended time, typically 20-30 minutes, depending on your recipe and desired consistency. Monitor the process; the mixture will gradually thicken into a soft-serve consistency. Avoid interrupting the churning cycle prematurely.
Churning Time: Achieving the Perfect Consistency
The ideal churning time varies based on your recipe, the ambient temperature, and the desired consistency. Generally, 20 to 30 minutes yields a soft-serve texture, perfect for immediate enjoyment. For a firmer consistency, continue churning for an additional 5-10 minutes, carefully observing the mixture.
Pay attention to the sound of the machine; it may become slightly louder as the mixture thickens. Visually inspect the ice cream – it should pull away from the sides of the bowl and form soft peaks. Avoid over-churning, as this can result in a grainy texture.

Remember, homemade ice cream is softer than commercially produced varieties directly after churning. A brief hardening period in the freezer will further improve its scoopability and overall texture. Experiment to find your perfect churning time!
Post-Churning and Serving
Enjoy your freshly churned creation! Immediate serving offers a soft-serve delight, while a quick freeze enhances firmness for classic scoopable ice cream enjoyment.
Checking for Desired Consistency
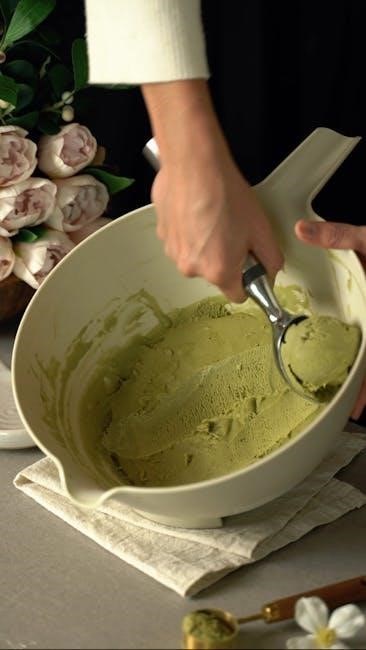
Assessing the ice cream’s texture is key to a perfect result. After the churning cycle completes, carefully lift the lid and visually inspect the mixture. Ideally, it should resemble a soft-serve consistency – thick, creamy, and holding its shape, but still pliable.
If the mixture appears too liquid, continue churning for an additional 5-10 minutes, checking every few minutes. Remember that the ice cream will firm up considerably during the hardening process in the freezer. Conversely, if it seems overly frozen and difficult to stir, you may have churned it for too long.
A gentle press with a spoon should leave a visible impression without collapsing entirely. Don’t be afraid to taste-test a small portion! This is the most reliable way to ensure it meets your preferred sweetness and texture. Adjust future batches based on your findings.
Hardening the Ice Cream: Final Freezing Steps
To achieve a scoopable, firm texture, transferring the freshly churned ice cream to an airtight container is crucial. Select a container made of glass or plastic, leaving about half an inch of headspace at the top to allow for expansion during freezing. Gently press a piece of plastic wrap directly onto the surface of the ice cream to prevent ice crystals from forming.
Place the container in the coldest part of your freezer – typically the back or bottom – and freeze for at least 2-4 hours, or preferably overnight. This “hardening” process allows the ice cream to fully set. The longer it freezes, the firmer it will become.
Before serving, let the ice cream sit at room temperature for 5-10 minutes to soften slightly, making it easier to scoop and enjoy.
Serving Suggestions and Topping Ideas
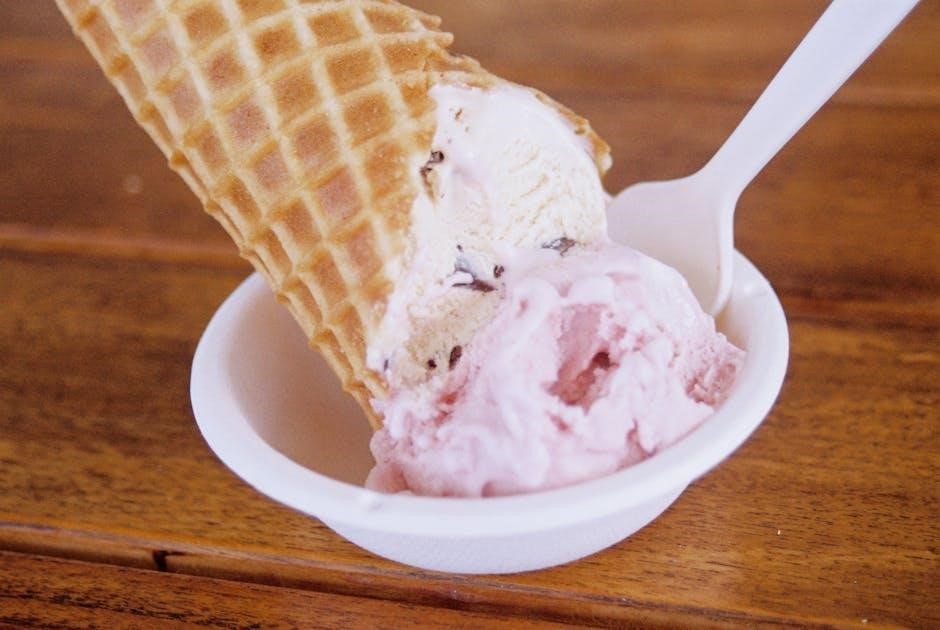
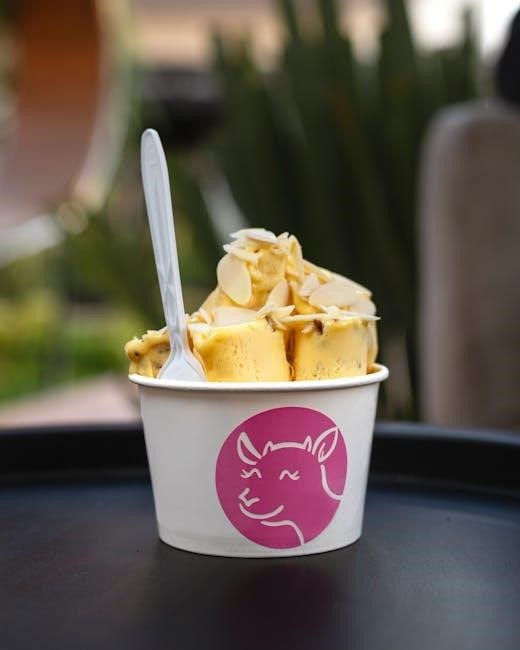
Elevate your homemade ice cream experience with creative serving suggestions! For a classic treat, serve in waffle cones or traditional bowls. Consider layering with warm brownies, cookies, or fruit crumbles for a delightful textural contrast. A drizzle of chocolate sauce, caramel, or fruit puree adds a touch of indulgence.
Toppings abound! Fresh berries, chopped nuts, sprinkles, whipped cream, and chocolate shavings are always crowd-pleasers. Experiment with more adventurous options like crushed pretzels, toasted coconut flakes, or a sprinkle of sea salt for a unique flavor profile.
Don’t forget complementary pairings – a scoop of vanilla alongside warm apple pie or a chocolate sorbet with a rich espresso.

Cleaning and Maintenance
Ensure longevity of your Deni ice cream maker with proper care! Regular cleaning and meticulous maintenance are vital for optimal performance and hygiene.
Disassembling the Machine for Cleaning
Before initiating the cleaning process, always disconnect your Deni ice cream maker from the power outlet to prevent accidental operation and ensure safety. Carefully remove the freezing bowl; it’s often the heaviest component. Next, detach the paddle and any accompanying dasher attachments – these typically lift straight off.
Inspect the motor housing; some models allow for the removal of the paddle gear, while others require cleaning in situ. Refer to the detailed diagrams in this manual for specific disassembly instructions related to your Deni model.
Pay close attention to any rubber seals or gaskets, noting their position for reassembly. Avoid using excessive force during disassembly; if a component feels stuck, consult the troubleshooting section or contact customer support. Proper disassembly facilitates thorough cleaning and prevents damage to delicate parts.
Washing and Drying Components
After disassembly, wash all removable parts – the freezing bowl, paddle, dasher, and any lids – in warm, soapy water. Avoid abrasive cleaners or scouring pads, as these can damage the surfaces. A soft sponge or cloth is ideal. Rinse thoroughly to remove all traces of soap. The motor housing should be wiped down with a damp cloth only; never immerse it in water.
For stubborn residue, a brief soak in warm water can be helpful. Ensure all components are completely dry before reassembling. Air drying is recommended, but you can use a soft towel.
Pay particular attention to drying the paddle and dasher assembly, as trapped moisture can lead to corrosion. Proper drying prevents mold growth and ensures optimal performance during future use. Avoid dishwashers unless specifically stated as dishwasher-safe in your model’s specifications.
Long-Term Storage Instructions
When storing your Deni ice cream maker for extended periods, ensure all components are thoroughly cleaned and completely dry to prevent mold or mildew. Store the freezing bowl separately, as it requires careful handling. The motor base should be kept in a cool, dry place, away from direct sunlight and extreme temperatures.
It’s advisable to store the paddle and dasher assembly inside the freezing bowl to prevent loss of parts. Keep the original packaging if possible, providing extra protection during storage. Avoid stacking heavy items on top of the machine, which could cause damage.
Regularly check the stored machine for any signs of deterioration. Proper storage extends the lifespan of your Deni ice cream maker, ensuring years of delicious homemade treats.

Troubleshooting Common Issues
Resolve typical problems quickly! This section provides solutions for issues like the machine not starting, improper freezing, or unusual noises during operation—enjoy smooth churning.
Machine Not Turning On
If your Deni ice cream maker fails to power on, begin with the simplest checks. Ensure the power cord is securely plugged into both the machine and a functioning electrical outlet. Verify the outlet is delivering power by testing it with another device. Next, examine the power switch itself; confirm it’s fully engaged in the ‘on’ position.

Consider if a circuit breaker has tripped. Reset the breaker if necessary. Some models feature a thermal overload protection system; if activated, allow the machine to cool down completely before attempting to restart it. Inspect the power cord for any visible damage, such as cuts or fraying. A damaged cord presents a safety hazard and should be replaced. Finally, consult the manufacturer’s website or support documentation for model-specific troubleshooting steps, as certain Deni models may have unique power-related features or indicators.
Ice Cream Not Freezing Properly
If your ice cream mixture isn’t freezing within the expected churning time, several factors could be at play. The most common issue is an insufficiently frozen bowl. Ensure the bowl has been frozen solid for the recommended 24 hours, and that it remains consistently frozen before and during operation. Verify the mixture’s temperature; it should be thoroughly chilled before pouring into the machine.
Also, check the consistency of your ice cream base. It needs sufficient fat content for proper freezing. Insufficient ingredients or improper ratios can hinder the process. Ensure the machine’s lid and dasher are correctly assembled and securely fastened, as improper assembly can reduce churning efficiency. Finally, ambient room temperature can impact freezing; avoid operating the machine in a warm environment.
Unusual Noises During Operation
Hearing strange sounds while your Deni ice cream maker is running is often a sign of a minor issue. A clicking or scraping noise could indicate ice crystals forming around the dasher; this is usually normal, especially during the initial stages of churning. However, loud grinding or rattling sounds warrant investigation.
Ensure the dasher is properly seated and rotating freely within the frozen bowl. Check for any obstructions, like frozen chunks of mixture, that might be hindering movement. Confirm all components are securely assembled. If the noise persists, immediately stop the machine and unplug it. Avoid forcing operation if resistance is felt, as this could damage the motor or internal parts. Contact customer support if the problem continues.