RC10 B74.2 Manual: A Comprehensive Guide
This guide details the assembly, tuning, maintenance, and troubleshooting of the Team Associated RC10 B74.2 4WD electric off-road buggy kit.
Welcome to the world of competitive RC off-road racing with the Team Associated RC10 B74.2! This kit represents the pinnacle of 1:10 scale 4WD buggy engineering, designed for serious racers seeking performance and adjustability. The B74.2 builds upon a legacy of championship-winning designs, incorporating the latest advancements in materials and geometry.
This manual provides a comprehensive, step-by-step guide to assembling and tuning your B74.2. It’s crucial to carefully read and understand each section before proceeding. Remember, this is a kit requiring completion with additional components – a radio system, battery, and ESC are essential. Prepare for a rewarding build and exceptional on-track performance!
Kit Contents Overview
Your RC10 B74.2 kit arrives unassembled, containing a comprehensive array of precision-molded parts. These include the main chassis, suspension arms, shock towers, drivetrain components, and various hardware like screws (e.g., 31521 x2 M5x8x2.5mm) and ball studs (92167 6mm). Carefully inventory all parts against the included parts list to ensure everything is present before beginning assembly.
The kit focuses on providing a robust and adjustable platform. Note that the kit does not include essential electronics or power systems. You’ll need to source these separately. Detailed inspection of components will help familiarize you with the B74.2’s construction.
Required Completion Items
To complete your RC10 B74.2 build, several items are necessary beyond the kit’s contents. Primarily, you’ll require a radio system – a two-channel surface frequency setup is recommended. Don’t forget AA-size batteries for the transmitter (alkaline 302s are suggested). An Electronic Speed Control (ESC) is crucial; options include the 27004 or 27033 models.
Additionally, a battery pack (specifications detailed below) and a suitable battery charger are essential. Tools like screwdrivers, pliers, and potentially a hobby knife will also be needed for assembly and maintenance.
Radio System Requirements
The RC10 B74.2 requires a compatible radio system for operation. A two-channel surface frequency radio is specifically recommended for optimal control. Ensure your chosen system supports proportional steering and throttle, allowing for precise adjustments during racing. Consider features like adjustable endpoints and exponential settings for customized handling.
Verify the radio’s frequency band is appropriate for your racing location to avoid interference. A reliable receiver is also vital, ensuring a stable connection with the transmitter. Proper antenna placement is key for maximizing signal range and minimizing dropouts.
Battery Specifications
Powering the RC10 B74.2 demands careful battery selection. This kit is designed for use with battery packs providing 7.4V (2S) LiPo configurations. Capacity (mAh) influences runtime, with higher values offering extended track time. The C-rating dictates the battery’s discharge rate; higher C-ratings are crucial for demanding racing conditions and maximizing performance.
Ensure your chosen battery’s dimensions fit within the designated battery compartment. Always use LiPo-compatible chargers and follow safe charging practices to prevent damage or fire hazards. Proper battery maintenance, including storage discharge, extends lifespan.
ESC (Electronic Speed Control) Options
Selecting the right ESC is vital for optimal RC10 B74.2 performance. Team Associated recommends ESCs like the 27004 or 27033 models, designed for compatibility and efficiency. Consider an ESC with adjustable settings, including timing, drag brake, and throttle curves, for fine-tuning. Ensure the ESC’s amperage rating exceeds the motor’s maximum draw to prevent overheating.
Modern ESCs often feature data logging capabilities, aiding in performance analysis. Proper ESC programming and calibration are essential for smooth operation and maximizing power delivery. Always consult the ESC’s manual for detailed setup instructions.
Assembly Process ― Initial Steps
Begin the RC10 B74.2 build by carefully unpacking and organizing all kit components. Thoroughly review the parts list to familiarize yourself with each item. Initial steps involve assembling the chassis, typically starting with Bag 1. Ensure all screws are properly tightened, but avoid over-tightening to prevent damage.
Pay close attention to the manual’s illustrations and instructions. Building in a clean, well-lit area is recommended. Double-check each step before proceeding to the next, ensuring correct parts orientation and alignment. Patience and precision are key to a successful build.
Bag 1: Chassis Assembly
Bag 1 focuses on constructing the foundational chassis of the RC10 B74.2. This stage involves assembling the main chassis plate, side rails, and associated hardware. Carefully attach the front and rear chassis braces, ensuring proper alignment. Utilize the provided screws – often 31521 x2 M5x8x2.5mm – and tighten them securely.
Pay attention to the orientation of the chassis components as indicated in the manual. Proper chassis assembly is crucial for overall vehicle stability and performance. Double-check all connections before moving to the next bag, guaranteeing a solid base for subsequent builds.
Bag 2: Suspension Arms & Hubs
Bag 2 centers around building the suspension system, starting with the arms and hubs. Assemble the front and rear suspension arms, attaching them to the hubs using appropriate hardware. Ensure smooth movement of the arms on the pivot balls. This bag often utilizes 6mm ballstuds (92167) for linkage connections.
Pay close attention to the left and right arm distinctions. Correct assembly is vital for proper suspension geometry and handling. Verify that the hubs rotate freely and that all screws are tightened to the recommended torque, preventing unwanted play during operation.
Drivetrain Assembly
The drivetrain assembly is crucial for transferring power to the wheels efficiently. This stage involves assembling the differential, gears, and related components. Proper differential shimming is essential for optimal performance and longevity, preventing excessive wear or binding. Gear replacement procedures should follow the manual’s guidance precisely, ensuring correct mesh and alignment.
Accurate gear mesh adjustment is paramount; too tight causes friction, while too loose leads to stripping. Regularly inspect gears for wear and replace them as needed. A well-maintained drivetrain maximizes power delivery and improves overall vehicle performance.
Differential Shimming & Maintenance
Proper differential shimming is vital for consistent handling and preventing drivetrain issues. The RC10 B74.2’s differential requires precise shimming to eliminate excessive play while avoiding binding, impacting cornering speed and overall performance. Regularly disassemble, clean, and inspect the differential for worn or damaged parts.
Replace differential balls and shims as needed, following the manual’s recommended specifications. Consistent maintenance extends the differential’s lifespan and ensures smooth, predictable power transfer. Incorrect shimming can lead to premature wear and reduced performance on the track.
Gear Replacement Procedures
Replacing gears in the RC10 B74.2 requires careful attention to detail to maintain optimal drivetrain efficiency. Begin by disassembling the gearbox, noting the gear positions and mesh settings. Inspect all gears for wear, damage, or broken teeth, replacing any compromised components with genuine Associated parts.
Apply high-quality grease to the gears during reassembly to reduce friction and wear. Ensure proper gear mesh for smooth operation and prevent stripping. Refer to the manual for specific gear ratios and recommended maintenance intervals for peak performance.
Gear Mesh Adjustment
Proper gear mesh is crucial for the RC10 B74.2’s performance and longevity. Incorrect mesh can lead to excessive heat, reduced efficiency, and premature gear failure. Begin by loosening the motor mounting screws, allowing for adjustment. With the pinion engaged with the spur gear, check for smooth rotation.
Use a piece of paper between the gears; it should have slight resistance when rotated. Tighten the motor screws, rechecking the mesh. Fine-tune until smooth and quiet operation is achieved, avoiding binding or excessive play. Regular checks are vital!
Steering System Setup
The RC10 B74.2 steering system requires precise setup for optimal responsiveness and control. Begin with the installation of the steering linkage, ensuring smooth movement without binding. Pay close attention to ball stud placement, specifically utilizing the 6mm ballstud (92167) as indicated in the manual.
Properly positioned ball studs influence steering feel and responsiveness. Adjust linkage lengths to achieve desired steering throw and sensitivity. Regularly inspect the steering components for wear and tear, replacing parts as needed to maintain peak performance and precision on the track.
Steering Linkage Installation
Carefully install the steering linkage components, referencing the manual’s diagrams for correct orientation and placement. Ensure the linkages connect securely to the steering arms and servo horn, utilizing the provided hardware. Verify free movement throughout the entire steering range, checking for any binding or restrictions.
Proper linkage installation is crucial for precise steering control. Double-check all screws are tightened to the recommended torque specifications. Smooth, consistent steering response relies on accurate linkage setup and proper component alignment during assembly.
Ball Stud Placement (6mm ballstud 92167)
Accurate placement of the 6mm ball studs (part number 92167) is vital for optimal steering geometry and responsiveness. Refer to the manual’s illustrations to identify the correct locations on the steering knuckles and steering arms. Ensure the ball studs are securely fastened, but avoid over-tightening, which could damage the plastic components.
Proper ball stud positioning directly impacts bump steer and overall handling characteristics. Experiment with different hole locations to fine-tune steering feel and adjust for track conditions. Consistent checking ensures smooth operation.
Shock Assembly & Tuning
Proper shock assembly and tuning are crucial for maximizing the RC10 B74.2’s handling performance. Begin by carefully assembling the shocks, ensuring smooth piston movement and leak-free seals. Shock oil viscosity significantly impacts damping; thicker oil provides more resistance, while thinner oil offers less.
Spring rate selection complements oil choice, influencing how the buggy reacts to bumps and jumps. Consider track surface and driving style when choosing springs and oil. Experimentation is key to finding the optimal setup for your needs.
Shock Oil Selection
Selecting the correct shock oil is paramount for achieving optimal damping characteristics on your RC10 B74.2. Viscosity, measured in centistoke (cSt), dictates the oil’s resistance to flow. Lower cSt oils (e.g., 30-35 cSt) are ideal for smooth tracks, providing a more responsive feel.
Higher cSt oils (e.g., 50-60 cSt) suit rougher surfaces, preventing bottoming out and enhancing stability. Temperature also affects oil viscosity; warmer temperatures thin the oil, reducing damping. Experiment with different weights to fine-tune handling.
Spring Rate Considerations
Spring rate, measured in pounds per inch (lbs/in), significantly impacts handling and responsiveness of the RC10 B74.2. Softer springs (lower lbs/in) offer increased grip on bumpy tracks, absorbing impacts effectively. However, they can lead to excessive body roll.
Stiffer springs (higher lbs/in) reduce body roll and improve responsiveness on smooth surfaces, but may decrease traction on rough terrain. Consider track conditions and driving style when selecting springs; experimentation is key to finding the ideal balance.
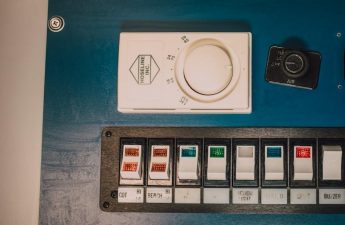
Electronics Installation
Careful electronics installation is crucial for optimal performance of your RC10 B74.2. Begin by securely mounting the ESC, ensuring adequate cooling airflow. Proper wiring, utilizing quality connectors, minimizes resistance and potential failures.
Receiver placement should prioritize signal clarity and protection from interference; avoid direct contact with metal components. Organize wiring neatly with zip ties to prevent entanglement and damage during operation. Double-check all connections before powering on to prevent shorts or malfunctions.
ESC Mounting & Wiring
Securely mount the Electronic Speed Control (ESC) within the chassis, utilizing double-sided tape or the designated mounting location. Ensure adequate airflow around the ESC to prevent overheating during extended runs.
Connect the ESC wires to the motor, following the manufacturer’s instructions for proper phase matching. Solder connections should be clean and insulated. Connect the ESC to the receiver, paying close attention to throttle and brake channels. Verify polarity before connecting the battery to avoid damage.
Receiver Placement
Strategically position the receiver within the chassis to minimize interference and protect it from damage. Avoid locating the receiver directly above the motor or ESC, as these components generate significant electromagnetic noise.
Utilize foam padding or a receiver box to dampen vibrations and further shield the receiver. Ensure the antenna wire is routed freely and extends fully for optimal signal reception. Secure the receiver with double-sided tape, ensuring it doesn’t interfere with other components or moving parts.
Body Mounting & Finishing
Proper body mounting and finishing enhance both the aesthetics and performance of your RC10 B74.2. Begin with body post installation, ensuring they are securely fastened and trimmed to the correct height for a flush fit.
Thoroughly clean the body with soap and water before painting. Apply multiple light coats of paint, allowing each coat to dry completely. Decaling requires patience; carefully apply decals using a soft cloth, removing any air bubbles. A final clear coat protects the paint and decals, extending their lifespan.
Body Post Installation
Securely mounting the body posts is crucial for proper body fit and performance. Begin by identifying the correct body post locations on the chassis. Carefully thread the body posts into the designated mounting points, ensuring they are snug but not overtightened.
Trim the body posts to the appropriate height, allowing the body to sit flush with the chassis without interference. Double-check alignment and stability before proceeding. Accurate body post placement prevents body rub and ensures optimal handling characteristics during operation.
Painting & Decaling
Personalize your RC10 B74.2 with a custom paint scheme and decals! Thoroughly clean the body with soap and water before painting. Apply several light coats of polycarbonate paint, allowing each coat to dry completely. Mask off areas for different colors, creating unique designs.
Once the paint is dry, carefully apply decals, smoothing out any bubbles. A decal softener can aid in conforming to body contours. Protect your artwork with a clear coat for durability. A well-painted and decaled body enhances both appearance and track presence.
Maintenance Schedule
Regular maintenance is crucial for peak performance and longevity of your RC10 B74.2. After each run, thoroughly clean the chassis and drivetrain, removing dirt and debris. Inspect for loose screws and tighten as needed. Every 3-5 runs, check wheel bearings for smoothness and clean/lubricate them.
Monthly, disassemble and inspect the differential, ensuring proper shimming. Periodically check gear mesh and replace worn gears; Consistent maintenance prevents costly repairs and ensures optimal racing performance, keeping your B74.2 competitive.
Regular Cleaning Procedures
Post-run cleaning is vital for maintaining your RC10 B74.2’s performance. Use compressed air to remove loose dirt from the chassis, suspension, and drivetrain. A soft brush and mild solvent (like isopropyl alcohol) can clean stubborn grime. Pay close attention to bearings, removing dirt to ensure smooth operation.
Inspect the tires for embedded debris and clean them thoroughly. Regularly cleaning prevents wear and tear, ensuring consistent handling and extending the life of your components. A clean buggy is a fast buggy!
Bearing Maintenance
Proper bearing care significantly impacts the RC10 B74.2’s performance and longevity. After several runs, remove bearings and clean them with bearing cleaner. Rotate each bearing while spraying to dissolve dirt and grime. Re-lubricate with bearing oil or grease, ensuring even distribution.
Inspect bearings for damage; replace any that feel rough or have excessive play. Shielded bearings offer better protection against contamination. Consistent bearing maintenance minimizes friction, maximizing efficiency and improving overall handling on the track.
Troubleshooting Common Issues
Addressing issues promptly keeps your RC10 B74.2 performing optimally. For motor problems, check connections, ESC settings, and motor temperature. Overheating indicates potential issues with gearing or the motor itself. Steering issues often stem from loose linkages or incorrect ball stud placement – verify all connections are secure.
If experiencing inconsistent handling, examine suspension components for wear or damage. Regularly inspect and tighten all screws. A methodical approach to diagnosis will quickly resolve most common problems, getting you back on the track.
Motor Issues
Diagnosing motor problems requires a systematic approach. Overheating is a common symptom, often caused by improper gearing or insufficient ventilation. Check the motor’s temperature after runs; excessive heat indicates a problem. Verify all wiring connections to the ESC and motor are secure and free from shorts.
If the motor isn’t running, confirm the ESC is programmed correctly and the battery has sufficient charge. A failing motor may exhibit reduced power or unusual noises. Regular cleaning and maintenance can prevent many motor issues.
Steering Problems
Addressing steering issues begins with inspecting the linkage for binding or looseness. Ensure all ball studs are securely fastened and that the servo horn is properly aligned with the steering arms. Check for any bent or damaged components within the steering system, including the steering posts and linkages.
If steering feels sluggish, verify the servo’s operation and adjust the endpoint settings on your radio system. Uneven tire wear or incorrect suspension setup can also contribute to steering problems. Proper ball stud placement (using 92167) is crucial.
Parts List & Ordering Information
Locating replacement parts for your RC10 B74.2 is essential for maintaining peak performance. Key components are identified with part numbers, such as 31521 x2 M5x8x2.5mm screws, facilitating accurate ordering. Associated Electrics provides a comprehensive parts list through their website and authorized dealers.
When ordering, double-check part numbers to ensure compatibility. Many online retailers specializing in RC car parts also carry a wide selection of B74.2 components. Maintaining a small stock of frequently used parts minimizes downtime and keeps you racing!
Identifying Key Components (e.g., 31521 x2 M5x8x2.5mm)
Accurate identification of parts is crucial during assembly and maintenance. The RC10 B74.2 utilizes numerous small components, each designated by a unique part number. For example, 31521 x2 denotes two M5x8x2.5mm screws. Understanding this nomenclature simplifies ordering replacements.
Refer to the parts list in the manual or on the Associated Electrics website for detailed diagrams and descriptions. Proper identification prevents incorrect parts usage, ensuring optimal functionality and preventing potential damage to your vehicle. Careful attention to these details saves time and frustration.
Where to Purchase Replacement Parts
Maintaining your RC10 B74.2 requires access to replacement parts. Associated Electrics offers a comprehensive online store at associatedelectrics.com, providing a direct source for all components. Additionally, numerous hobby shops worldwide stock Team Associated parts, offering convenient local purchasing options.
Online retailers specializing in RC cars, such as AMain Hobbies and Tower Hobbies, also carry a wide selection. When ordering, always verify part numbers to ensure compatibility. Prompt replacement of worn or damaged parts is vital for peak performance and longevity.
CE Supplement Information
This CE Supplement provides crucial information regarding compliance with European safety standards for the RC10 B74.2D. It details specific regulations and testing procedures to ensure the product meets required levels of electromagnetic compatibility (EMC) and other safety criteria.
Users within the European Economic Area must adhere to the guidelines outlined in this supplement. The document clarifies responsible disposal practices for electronic components and batteries, promoting environmental sustainability. Refer to the complete CE Supplement for detailed instructions and declarations of conformity.
Safety Precautions
Prioritize safety during assembly and operation of the RC10 B74.2. Always disconnect the battery before performing maintenance or adjustments. Use caution when handling electronic components, avoiding static discharge. Never operate the vehicle near people, animals, or property.
Inspect all components for damage before each use. Ensure proper gear mesh and secure fasteners to prevent mechanical failures. Adult supervision is recommended for younger users. Wear appropriate eye protection during operation. Follow all local regulations regarding RC vehicle usage.
Warranty Information
Team Associated warrants this RC10 B74.2 kit against manufacturing defects for a period of thirty (30) days from the date of purchase. This warranty covers replacement of defective parts only, and does not cover damage resulting from misuse, abuse, modification, or normal wear and tear.
To make a warranty claim, please contact the place of purchase with proof of purchase. Team Associated is not responsible for shipping costs associated with warranty claims. This warranty is void if the kit has been altered or repaired by anyone other than an authorized service center.